Enclave User Guide
Enclave Markets is the world’s first fully encrypted exchange (FEX). The platform is built entirely within a Secure Enclave that prevents any party, including the exchange operators, from reading order activity and secures assets using a mechanism that eliminates the possibility of a single point of failure. Our first product, Enclave Cross, gives users access to an institutional-grade, fully confidential mid-match platform that allows participants to trade blocks of digital assets at the given market price without market impact.
How to set up for an institutional trade on Enclave Cross
1
Have or create a standard ETH address on the mainnet. Vanity addresses will not work at the moment. The address must not be locked to just testnet.
2
Send the created mainnet address to Phil Wirtjes or David Wells. This will allow your address to be whitelisted and institutional KYC to be performed.
3
After Phil or David confirms that your address has been added, navigate to https://trade.enclave.market/. Please ensure that you’re using https, not http. Google Chrome or Brave are the browsers recommended by our team. Please ensure that you’re on this exact link, as you may have already received a link to a separate staging environment.
4
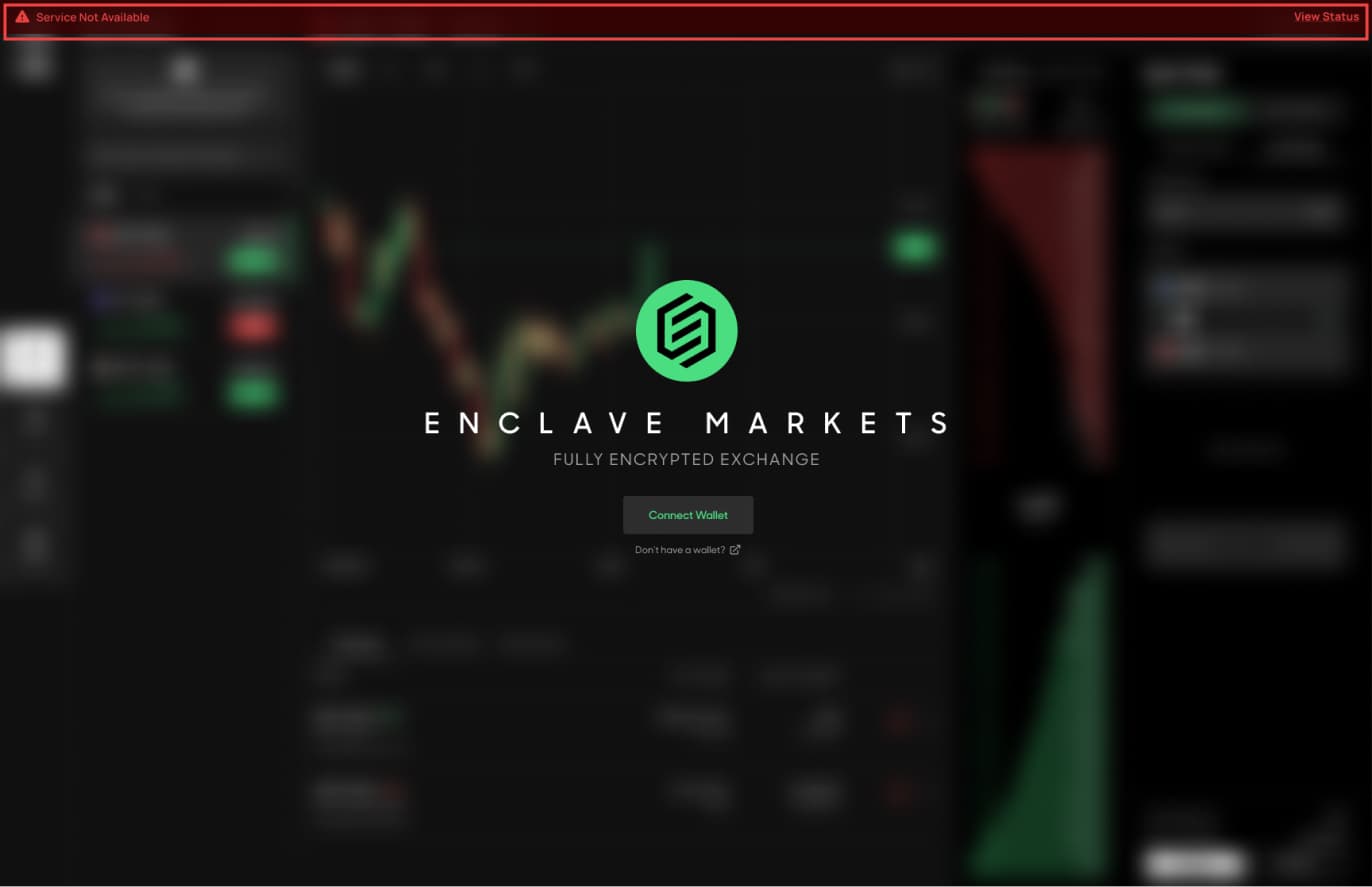
Once on the site, ensure that there is no banner warning of unavailable service (see top of image below).
5
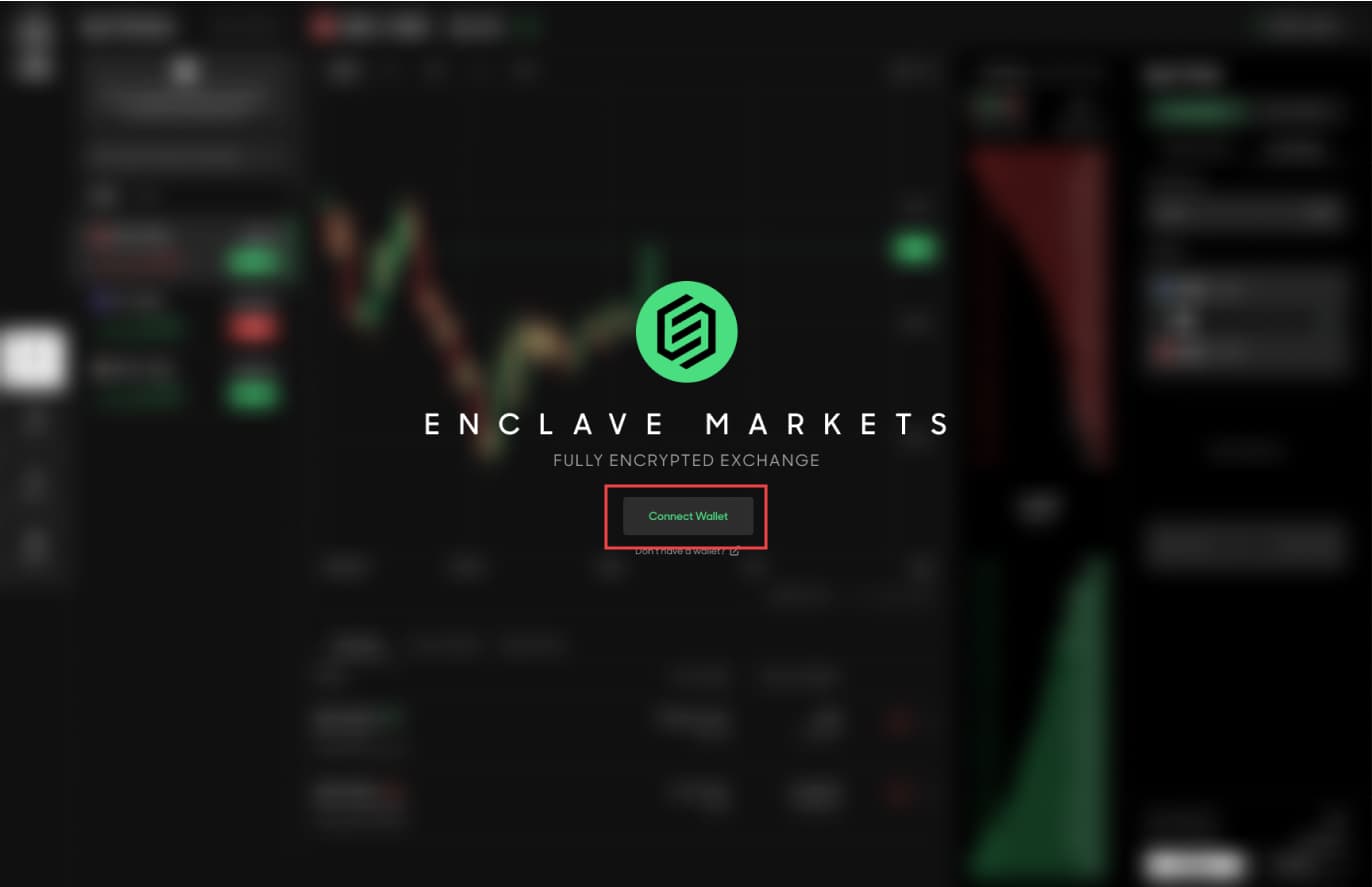
If there is no warning banner, click the “Connect Wallet” button.
6
Choose your preferred wallet, and complete the connection using it. You will be asked to sign a transaction to prove ownership of the wallet. Once done, you should arrive at a screen that will allow you to authenticate.
7
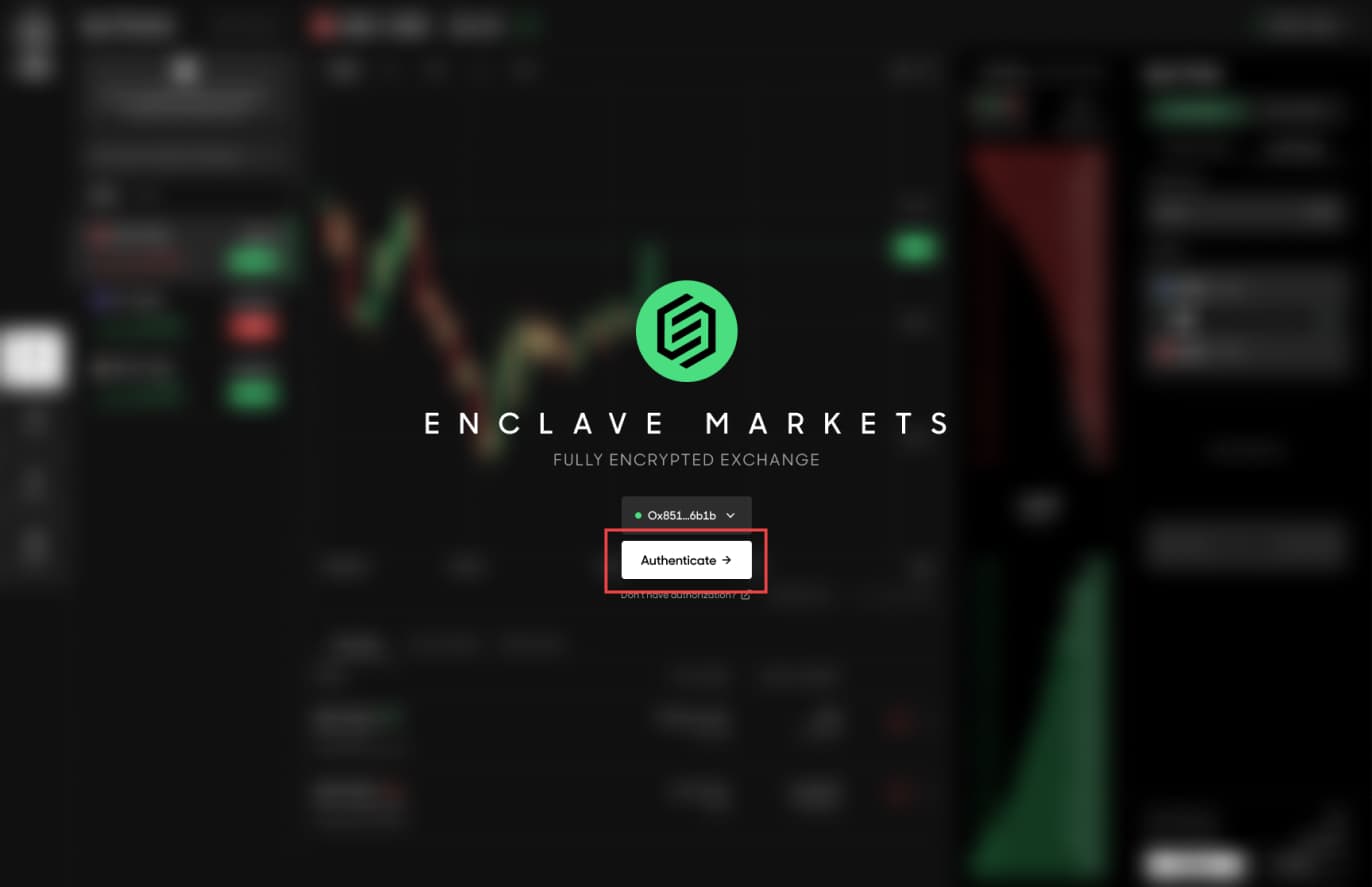
Ensure that the connected wallet is the one you would like to use with the system, then click the “Authenticate” button as shown below.
8
You will again be asked to sign a transaction with the connected wallet, and after signing will be allowed access and should see the dashboard. If after signing you receive the message that the system is only accessible to authorized users, ensure that your address is on the whitelist, and that there are no associated sanctions or other high risk activities tied to the account.
9
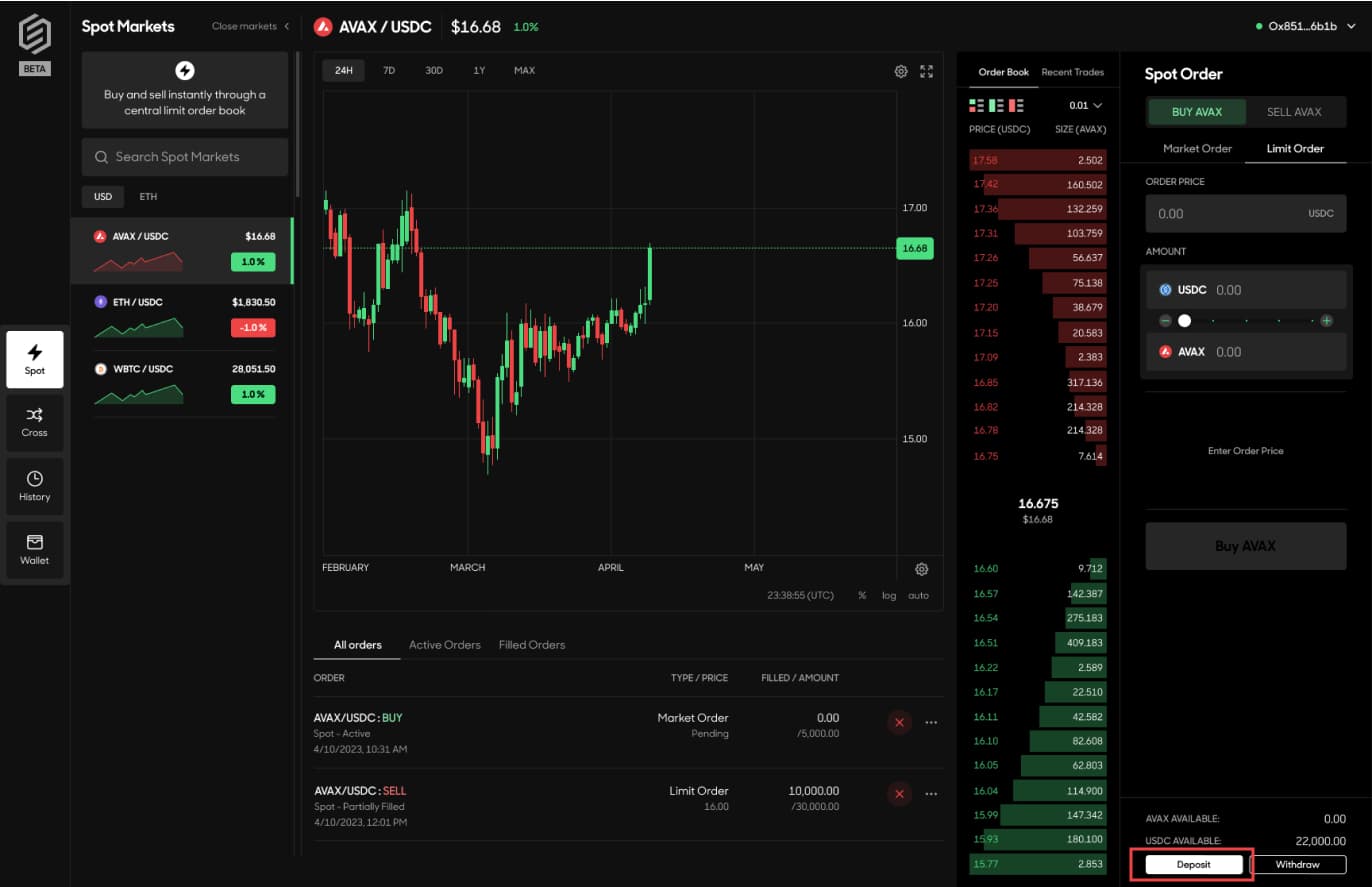
Once on the dashboard, click the “Deposit” button.
10
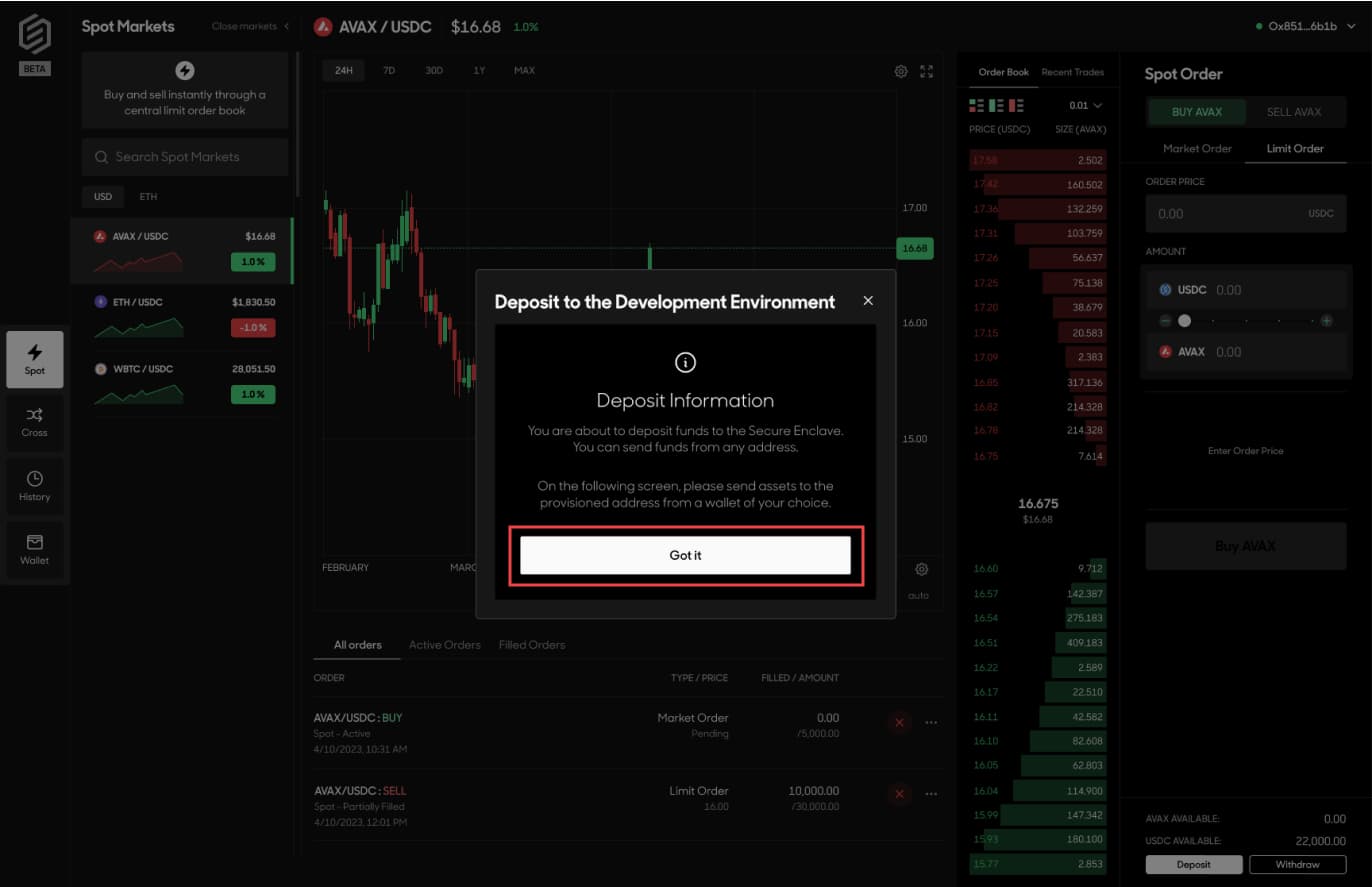
Ensure that you see the prompt below. Read the information given and then click the confirmation. If you do not see this prompt, and instead see an individual KYC flow, please confirm with Phil or David that you’ve been put through the institutional KYC
11
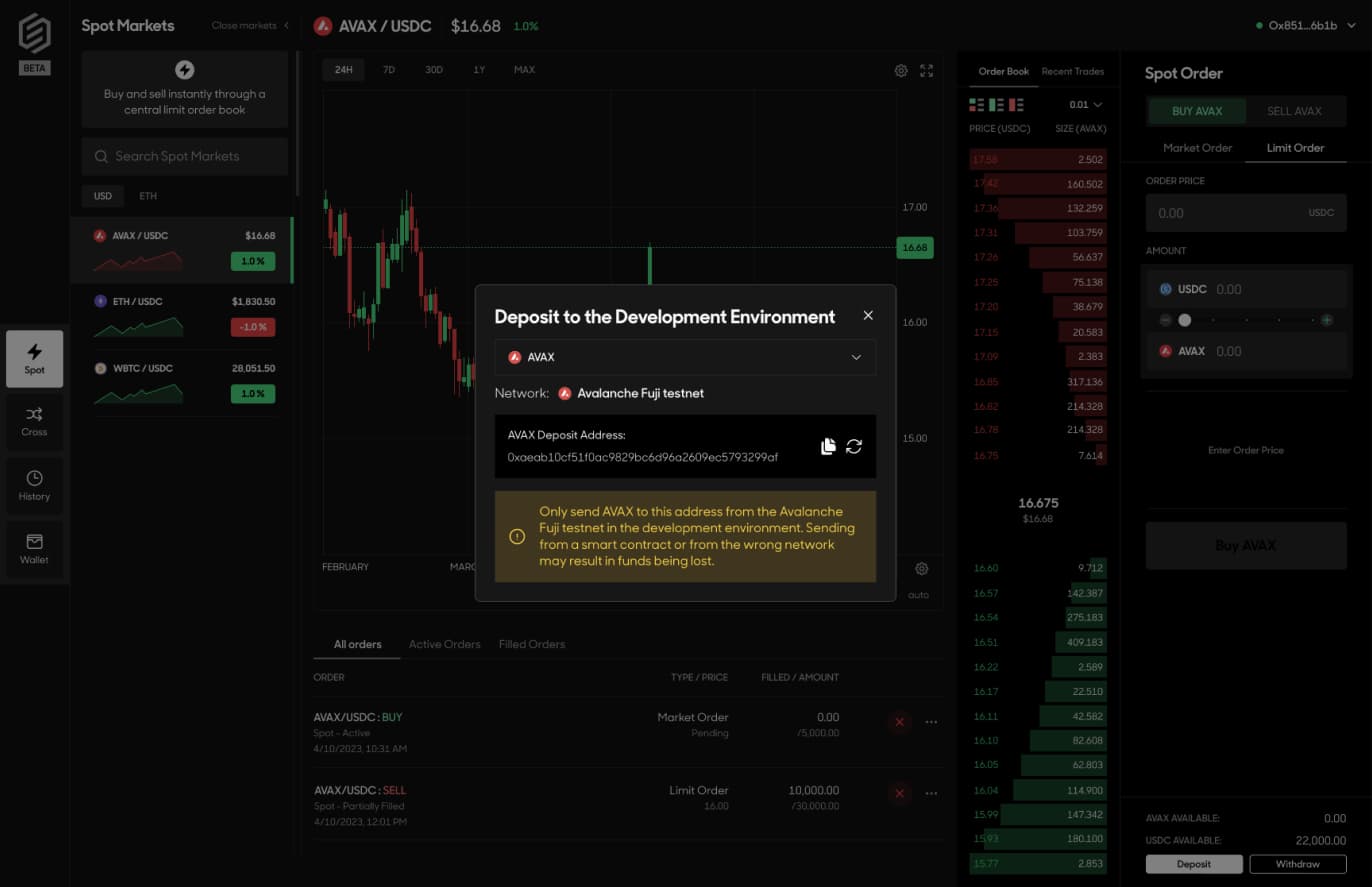
After clicking “Got it”, you can choose the asset you’d like to deposit.
12
Copy the provisioned address, and send a small mainnet test deposit to it. This deposit can come from any address, not just the one you authorized to the system with.
13
Exit out of the deposit screen, and confirm that your deposit went through using the balance tickers on the dashboard.
14
Once your balance is correctly showing, feel free to also test the withdrawal flow with your small amount. As long as there are no sanctions or high risk transactions associated with the address you provide, you can withdraw to any address.